Externalizing security in Oracle Data Integrator
Hello everyone, I have been meaning to write this tutorial for a long time, but got stuck with work and other commitments. Well, better late than never I guess.
Oracle has started allowing us to use third party authentication in its flagship integration product ODI since version 11g. This article deals with the latest version, 12.2.1. I will show you how to configure ODI to use an external directory for authentication. I will be using Weblogic server’s built-in Embedded LDAP server. I chose to do this because the LDAP server comes built-in and needs no separate installation. All we need is a very quick configuration of the weblogic server to make it our external directory. The same steps performed for this particular directory can be tweaked to use against other directory services such MSAD, OID etc.
Prerequisites:
- ODI 12.2.1 has been installed successfully.
- RCU has been executed to create an ODI repository. A SUPERVISOR connection has been created, tested, and SUPERVISOR user able to login successfully.
- Oracle Weblogic server has been installed, and a domain created and configured. ( I’ve used the EPMSystem Domain that gets created when installing Hyperion suite)
- Able to access Weblogic admin console as an admin user
- Familiarity with windows command line. (This can just as easily be done on Linux flavors as well. I just used windows for ease of setting up)
- Third party LDAP explorer tools. I chose the open source LDAPExplorerTool2 which served my purpose perfectly. It is useful to figure out the DC tree of the AD being used.
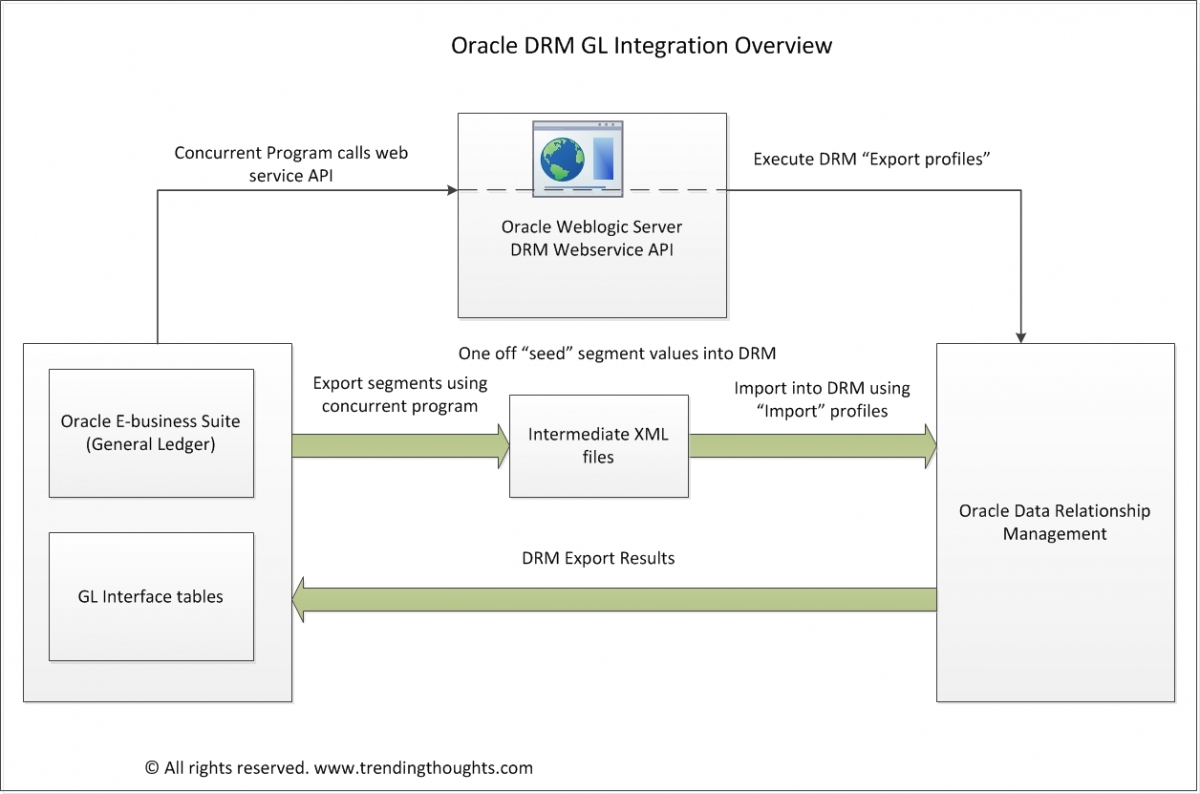
The following picture gives an overview of how ODI leverages the embedded LDAP server in the Weblogic server.
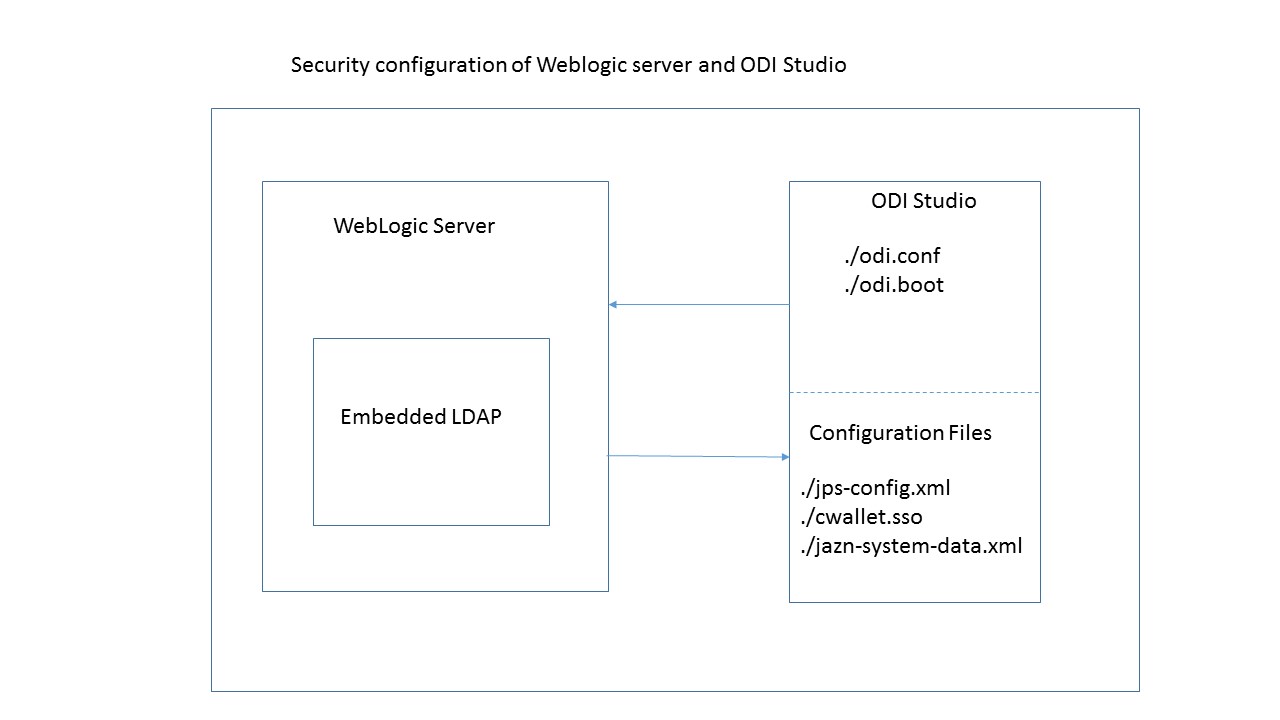
High Level architecture diagram for WLS and ODI security integration
[/vc_column_text][/vc_column][/vc_row][vc_row][vc_column][vc_column_text]I think it is easier to understand the process if we break down the steps into following five sub tasks.
- Configure the Embedded LDAP Server in WLS
- Use third party LDAP Explorer to collect domain information
- Copy the configuration files into the right ODI folders
- Update the configuration files; produce the cwallet.sso file by running the ODI_CREDTOOL.bat
- Externalize security in ODI
Now let’s get into each of these steps in more detail.[/vc_column_text][/vc_column][/vc_row][vc_row][vc_column][vc_column_text]
Configure the Embedded LDAP Server in WLS
This step is required because we need to change the default password of the EmbeddedLDAP server. We will need this password later when we create the cwallet.sso file.
- Start WLS server from the program menu
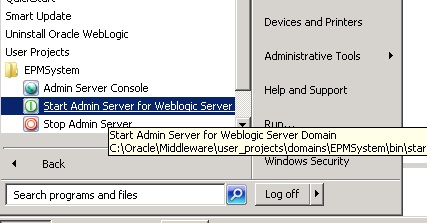
Start Weblogic Admin Server
- Once the server start and appears in “running” state, login to the console front end by visiting the URL. http://yourserver:7001/console
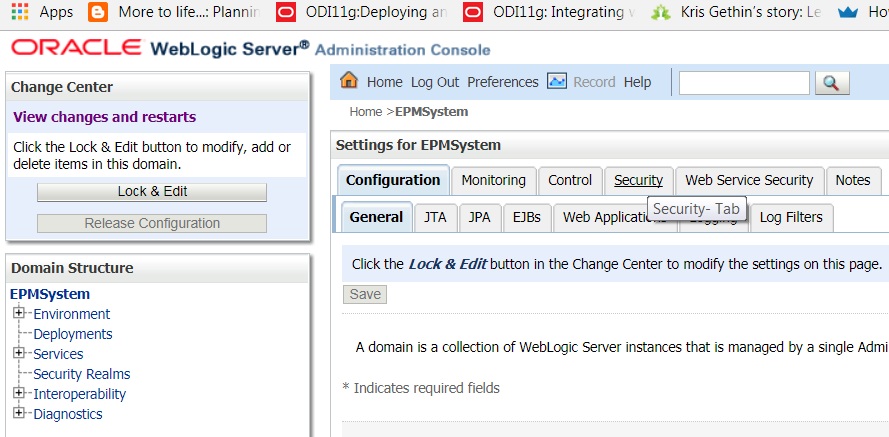
- After logging into the console, click on the topmost node, the domain name and the following screen should appear on the left hand panel.
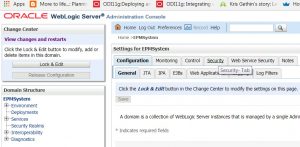
Domain settings
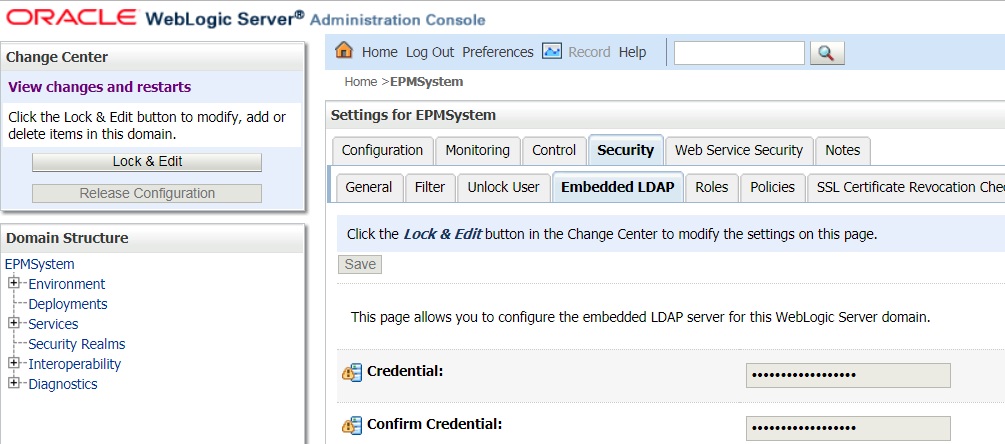
- Click on the “Security” tab and then the embeddedLDAP subtab.
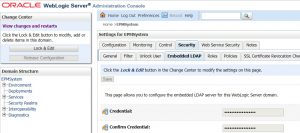
Embedded LDAP
- Click “Lock & Edit” and change the credential using a password of your choosing. After making this change, click save.
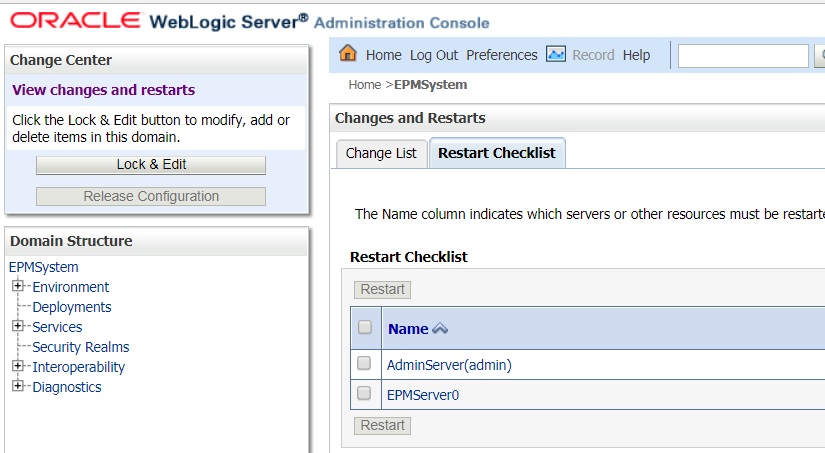
- Click the “Restart Checklist” and restart the necessary servers.
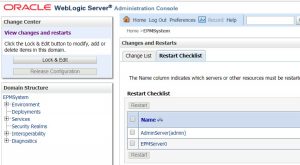
Restart the necessary servers
Now let’s add the users we are going to use in ODI. This is done by creating the users in the “myrealm” security realm.
- Click on “Security Realms” and then on “myrealm”
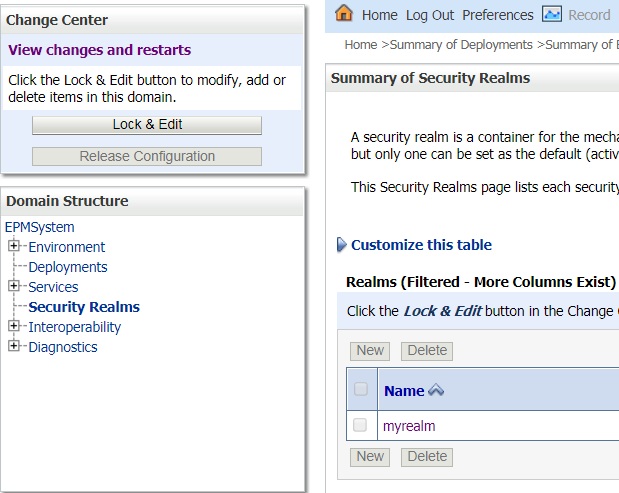
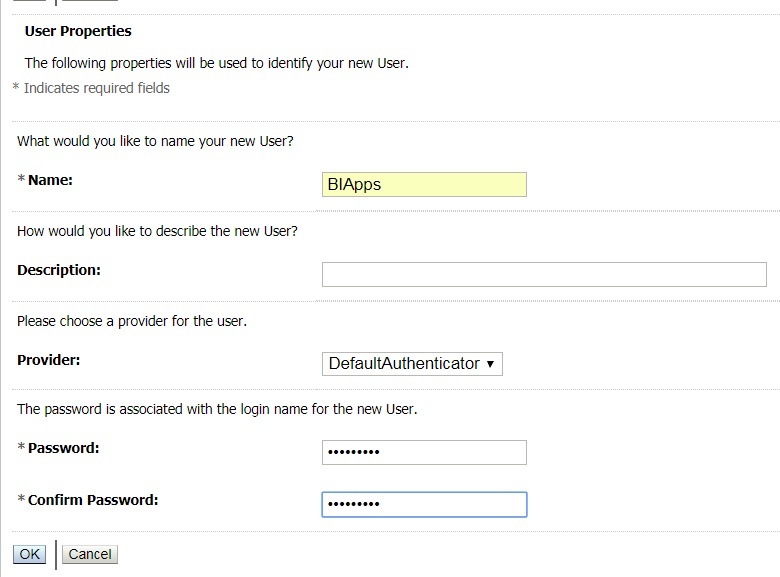
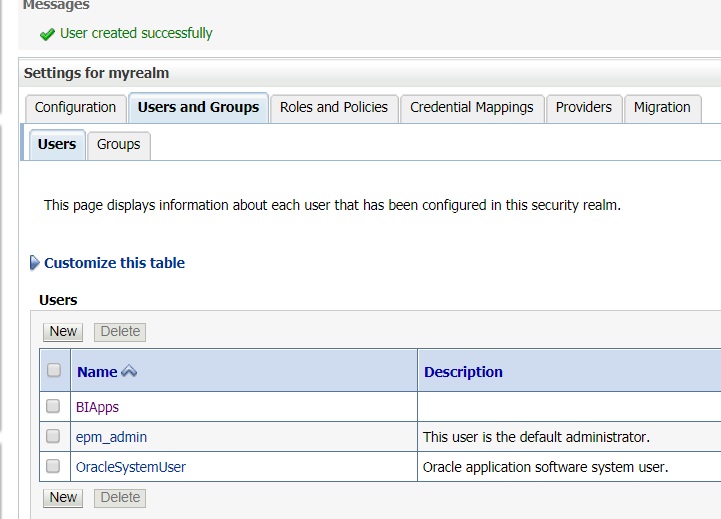
- Follow the steps to create users required for ODI
Use third party LDAP Explorer to collect domain information
This step is technically optional, but I found it very helpful in identifying the right DC string later in the process. If you are unlike me and are a guru with Active directories, you could skip this step.
- Download and install LDAPExplorerTool 2

Install something like an LDAP explorer
- Configure the above by giving a configuration name, followed by server details of the weblogic server, and then the credentials we have just updated.
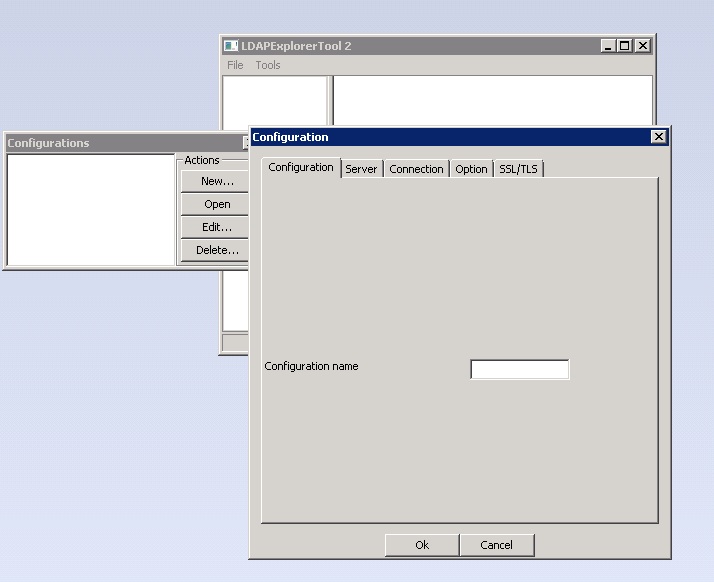
Give the configuration a name
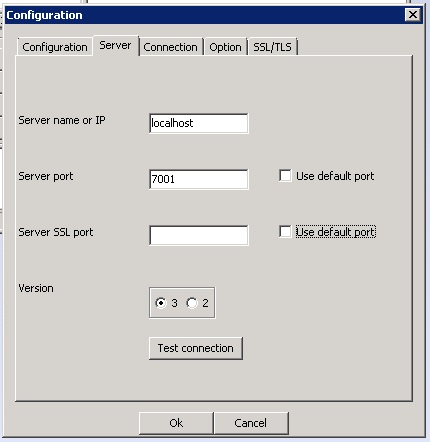
Use the URL for your local weblogic server
- In the connection tab, under user DN, type cn=Admin and enter the password from above.
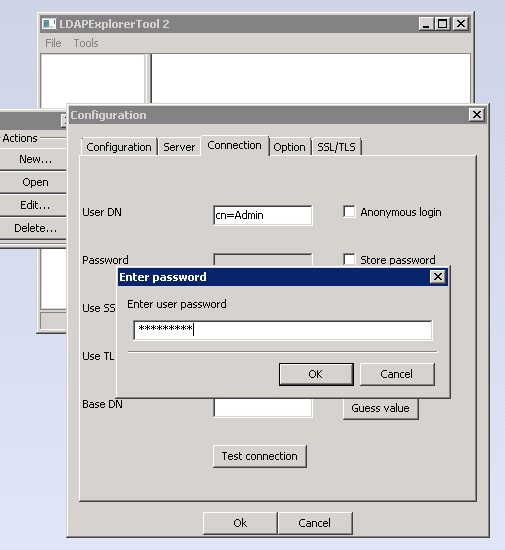
Password for admin account of Embedded LDAP server
- “Test OK” dialog indicates that the embeddedLDAP server is working properly.
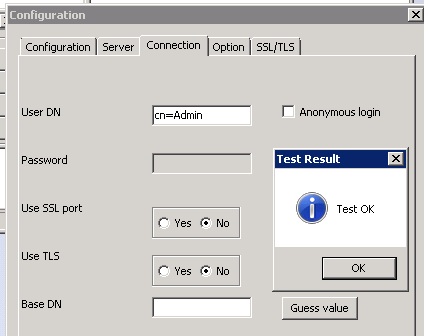
Test Successful
Copy the configuration files into the right ODI folders
We now need to copy some configuration files from the SDK folder into the ODI studio folder.
- Update the odi.conf file in the folder where ODI studio executable is, and add the following line to the file.
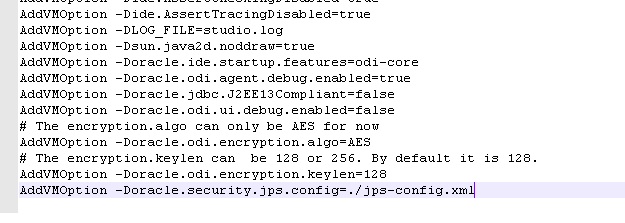
AddVMOption -Doracle.security.jps.config=./jps-config.xml
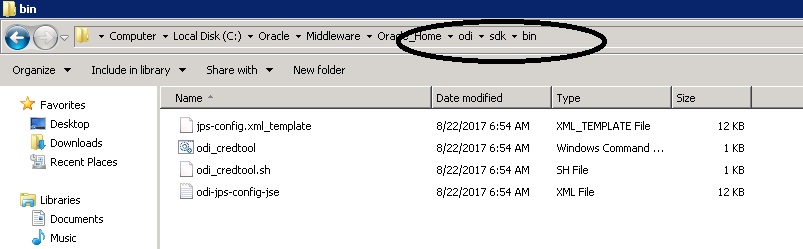
- Copy the odi_credtool.bat, odi-jps-config-jse.xml files from the ./sdk/bin folder as shown in the image below to the folder containing odi.exe
- Update the odi_credtool.bat file to remove the reference to %APPDATA% and replace it with the ODI.exe folder
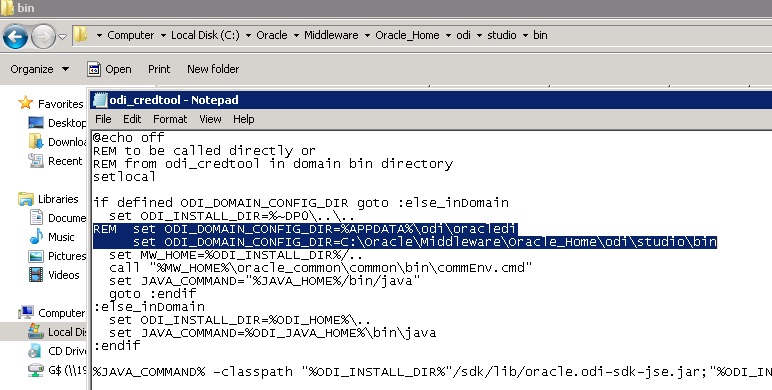
- Also update the reference to the config file to jps-config.xml within the same odi_credtool.bat file
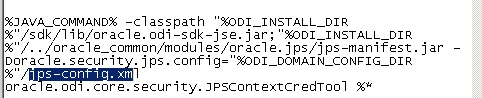
insert the jps-config.xml file
- Copy system-jazn-data from the location shown in the image below.
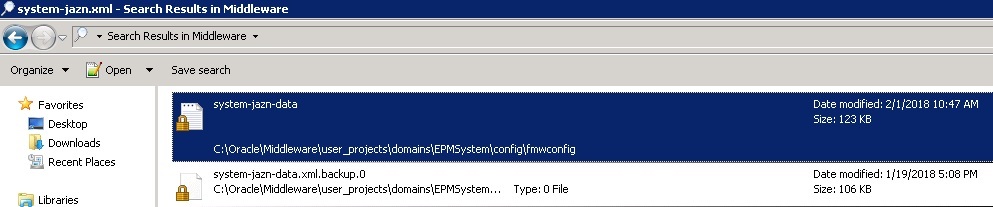
JAZN-SYSTEM
- Next, fire up the LDAPExplorer tool to derive the DC information string to be used in jsp-config.xml
 [/vc_column_text][/vc_column][/vc_row][vc_row][vc_column][vc_column_text]
Update the configuration files; Create the cwallet.sso file
- Add the following code snippet the jps-config.xml file.
https://gist.github.com/anonymous/cb148196665dc7e561cb16aa52e6dc96.js
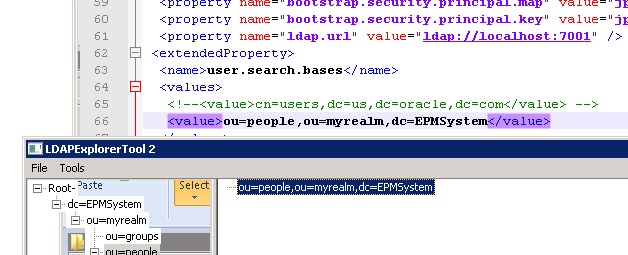
- Update the “value” section under user.search.bases to reflect what is shown in the LDAPExplorerTool. (This depends on your WLS configuration, and the domain you have created). Repeating the image below for convenience.
Type the domain information exactly as shown by the LDAP explorer tool
- Execute the odi_credtool.bat batch script from the command line
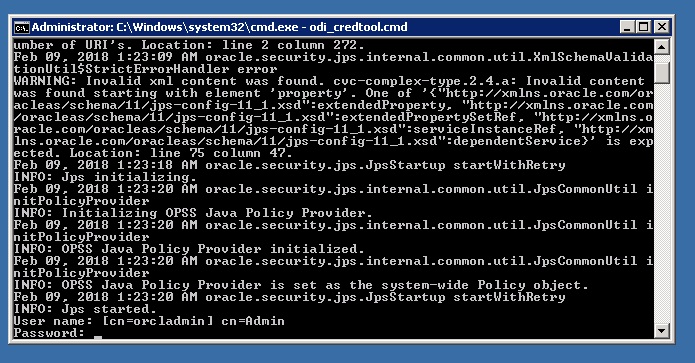
run the odi_credtool from command line’
Enter cn=Admin as user name
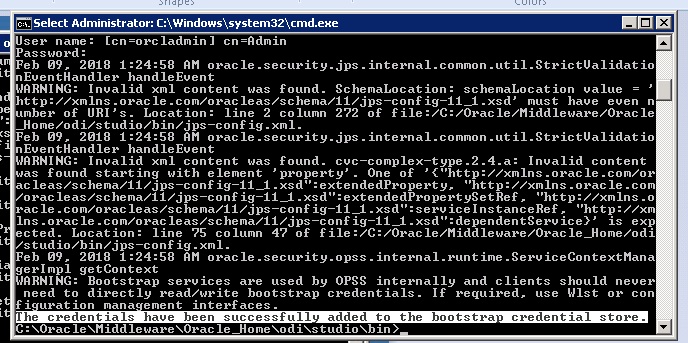
- Make sure the cwallet.sso file has the right timestamp to confirm it is the right file.
Externalize security in ODI
Once all the steps above are successfully completed, we are now ready to switch authentication in ODI.
- Login to ODI using the SUPERVISOR credentials, and add a new user with the same id as the one the Weblogic server.
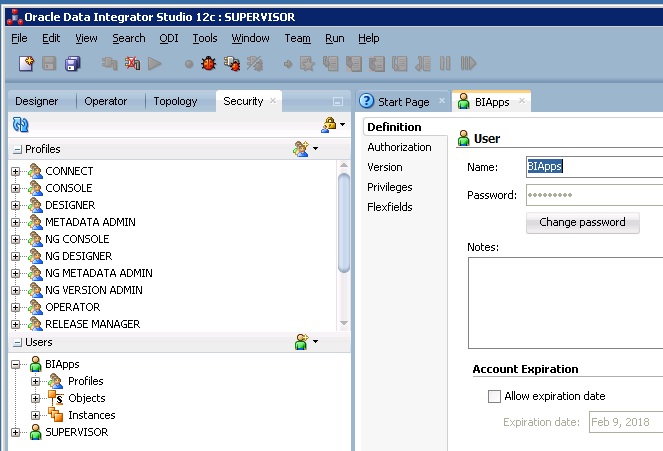
This user has to be exact replica of the one in weblogic server
- Fire up ODI studio, and select switch Authentication mode.
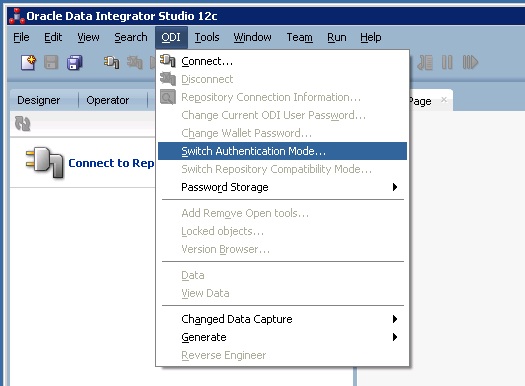
Externalise security
- Enter the password for the ODI repository created. Click next.
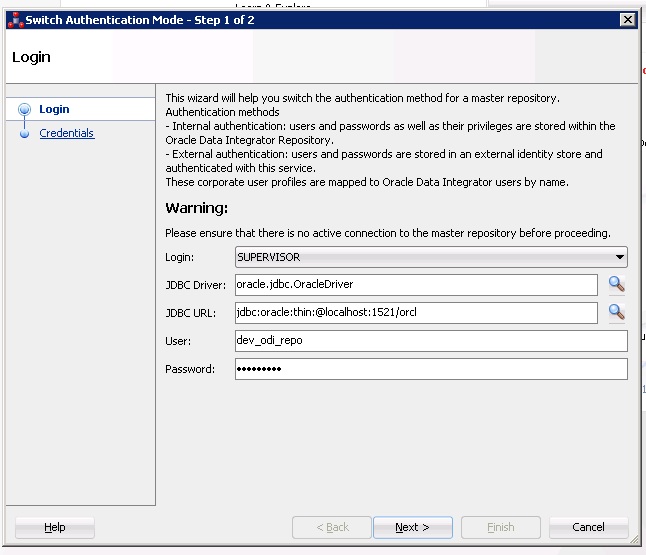
repository details
- Click the plus button and then the search button to retrieve users from the WLS Embedded LDAP server
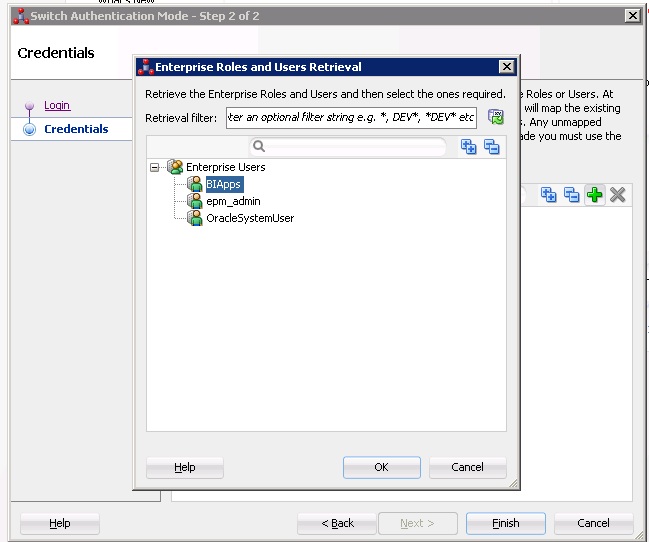
Select the BIApps user
- Select the BIApps user from the list of users, and click ok.
- If the step is successful, you will see the following dialog box.
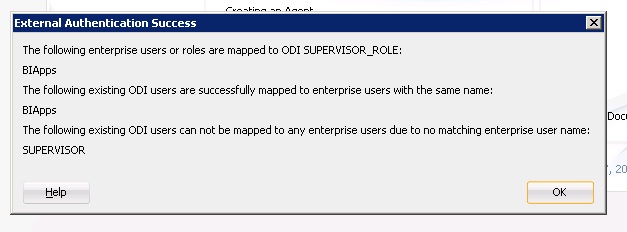
Externalization successful
- Update the login screen with the new user from WLS. Click the test button, and make sure the login works.
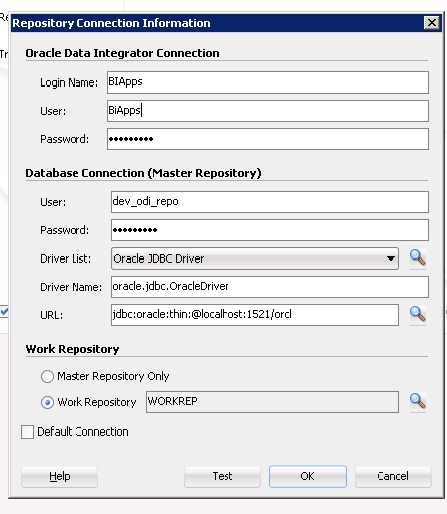
Setup a new login screen with externalized user
This completes the process of externalizing ODI security to the embedded LDAP server in Weblogic server. As I said in the beginning, the process can be tweaked to work with other directories like Microsoft AD, OID etc.
Please let me know if you have any questions, queries or suggestions. I would love to hear from you. Please reach out to me by either commenting on the post, or through my LinkedIn profile. Thanks for your time.
Recent Comments